
What makes IOD Moulds different from other molds? Here you will find everything you need to know about IOD molds and IOD Air Dry Clay, as well as how to use them to create beautiful castings.

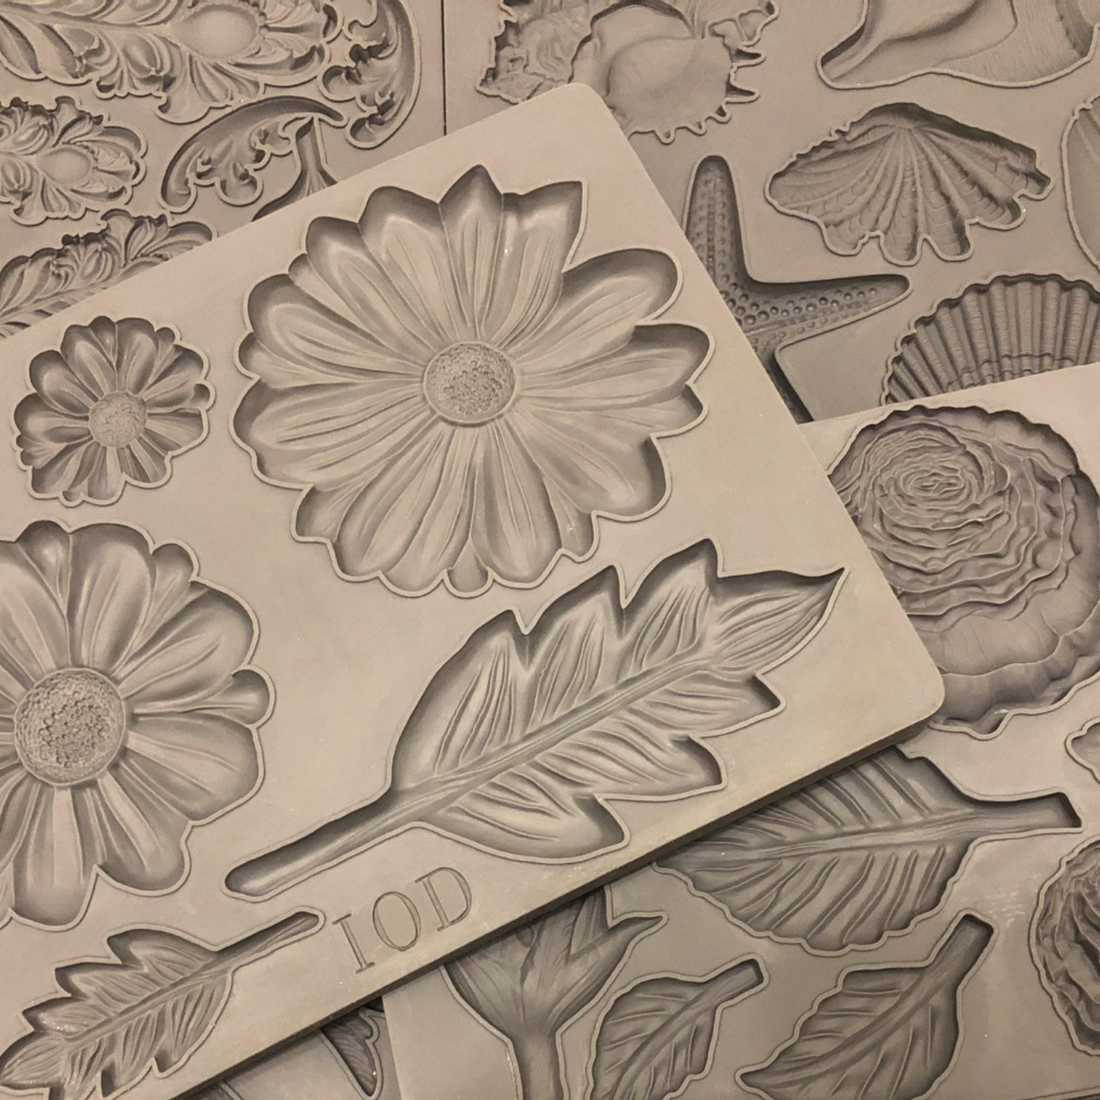
It’s no surprise that IOD molds are so popular among crafters and foodies alike! Made of high quality, food safe silicone, IOD Moulds are the prettiest I’ve seen yet, with a level of detail not found in any other molds on the market. Plus--the patent-pending micro rim is found only on IOD Moulds, ensuring a crisp clean edge on your castings. Here you will find all the basics you need to know to make all kinds of artistic and fun projects using these beautiful moulds!
IOD Air Dry Clay is the perfect clay for use with IOD molds. IOD Air Dry Clay is an artist-quality clay, meaning it will retain a higher level of detail than most other clay brands. As IOD Air Dry Clay dries, the detail will remain with a minimum of cracking and shrinkage. You will find IOD Air Dry Clay to be very soft and workable!
Using IOD Moulds:
Step 1: Measure out your clay and gently press it into the cavities. IOD has eliminated the guesswork of how much clay to use—you will find the exact measurements for both liquid and solids etched right into the newer molds.
Step 2: Remove the excess clay with your fingers and then take either your thumb or a pallet knife to get a smooth, flat casting and a clean edge at the micro rim.
Step 3: Turn your mold and use gravity to pop your casting out; it should release easily. Have a zipper storage bag handy while you work with your clay to keep the unused portion fresh, moist and protected from the air.
Common Questions and Answers about How to Use IOD Molds:
Will my castings stick to the mold, making them difficult to remove?
Because IOD molds are made of silicone, they do not require the use of a release; however, the easier the release, the greater the detail of your casting, so we recommend using a light dusting of corn starch in the cavities. If you put too much in, no worries, just invert your mold and give it a tap to remove the excess.
Where can I get ideas for how to lay out my castings?
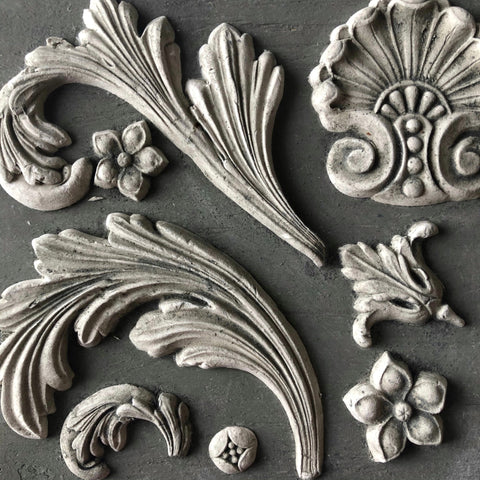
Find inspiration for your casting layouts and composition by emulating historical architecture and classical design. Pinterest and Facebook photos are great for finding ideas to build on. Emulate good design and make it your own. IOD molds are available in a variety of styles and shapes, so you will be sure to find exactly what you are looking for! Don’t be afraid to mix and match mold designs; you can even use parts of cavities from different molds to create new and unique designs!
What kind of adhesive should I use for my Air Dry Clay castings?
Most white glues and wood glues will work well with IOD Air Dry Clay. My personal favorite is Tite Bond Quick and Thick. Apply a generous amount of glue to the back of your castings to ensure good adhesion. Any excess glue can always be wiped away. Don’t press your molds too hard or you will lose detail--but press hard enough to make sure you make good contact with your project surface.
Should I apply my castings while wet or dry?
Either is fine, but I recommend you apply the mold castings while the clay is still moist and pliable, so that the casting will make good contact with and conform to the shape of your project surface.
What can I do to eliminate some of the cracking of the clay after it’s dry?
Although IOD Air Dry Clay shrinks less than most other air dry clays, expect some minimal cracking due to shrinkage. You can leave the cracking, giving your casting a vintage, aged look by adding extra visual interest and texture; or you can back-fill the cracks by waiting until the clay has dried. Use a tiny amount of clay rubbed into the cracks and use a small tool to remove any excess.
Should I paint the castings before or after they are dry?
IOD molds can be painted while wet but try to give them about 30 minutes of dry time before painting—this will give your casting time to form a “crust” on the surface. Use a soft brush when painting and do not press too hard as this can compromise the level of detail of your casting.
How can I decorate or paint my castings to create depth and bring out the beauty and detail of the mold design?
There are a variety of antiquing techniques that will make your mold details pop—consider a color wash, colored wax, scumble, glaze, aging dust or pigment powders to name a few. Use the appropriate sealer that compliments any of these products.
What can I use IOD molds for?
Use IOD molds to create castings for furniture, cabinetry and all sorts of home décor projects: lamps, picture frames, trays, the list is endless!
What kinds of mediums can I use in my IOD Moulds?
Almost any medium can be used with IOD Moulds: Two-part casting resin, earthen clay, polymer clay, hot glue, to name of few. Remember IOD moulds are food and oven safe, so consider using cookie dough, pastry and pie dough, chocolate, fondant, royal icing, marzipan, sugar paste, candy melts…the list goes on! Just keep separate sets of moulds for kitchen use and crafting use.
Is there any medium I can’t use with IOD Molds?
The only medium I am aware of that should never be used in IOD Molds are those that are silicone-based, such as caulking, which can bind to your mould and ruin it-- Don’t do it!!!!
How should I clean my IOD Moulds?
All you need to clean your mold is mild soap and water; I like to let them dry face-down on a towel.